Best Practices for
Avalanche Safety
Everything you've learned across this course comes down to three things in the field: how you move, how you communicate, and how quickly you adapt when conditions change. Part 7 brings it all together.
View Full Course →Avalanche safety is not a checklist you run through at the trailhead and then forget. It is a continuous process — from reading the bulletin the night before to the decisions you make on every slope transition throughout the day. The three pillars of this chapter — how you travel, how your group communicates, and how readily you adapt — are the behaviours that translate knowledge into survival.
"The best decisions in the backcountry are the ones that prioritise safety over summits. The mountain will always be there. Return safely, and go back."
1. Travel Techniques — Minimise Exposure to Risk
Every movement in avalanche terrain should be deliberate. The goal is to limit how long any person spends exposed to potential hazard — and to ensure that if something does happen, the group retains the capacity to rescue.
Movement · Positioning · RouteTravel Techniques
Expose One Person at a Time
When crossing suspect slopes, one person moves while the rest watch from a safe zone. If an avalanche releases, the group retains the ability to rescue — which is only possible if they weren't on the slope too.
- Cross steep, open slopes one at a time — never as a group
- Watchers position themselves where they can see the slope and the person, out of the runout zone
- Regroup only at designated safe areas — never in the middle of a slope
Choose Safe Zones for Stopping
Where you stop is as important as how you travel. Pausing in an unsafe area — mid-slope, near a terrain trap, or below a cornice — concentrates the group's exposure at exactly the wrong moment.
- Safe to stop: Ridgelines, dense forest, flat terrain below 25°, rock outcrops above the slope
- Never stop: Gullies, below cornices, open slopes above 30°, runout zones
Maintain Line of Sight
Group members should be able to see each other at all times in avalanche terrain. Losing visual contact delays emergency response — and means the group cannot mark a burial point accurately if someone is caught.
- Use pre-determined landmarks for regrouping
- Avoid spreading out across terrain features (ridges, trees) that block visibility
- The watcher's job is to track the person on the slope and mark the last-seen point if they're carried away
Plan Your Route to Minimise Exposure
Good route planning minimises the total time spent in avalanche terrain — not just the steepness of individual slopes. Evaluate the full line from approach to runout before you commit.
- Use ridgelines and safe terrain features for ascents wherever possible
- Identify alternate routes before you start — not when you need them
- On descents, choose lines with clean runouts away from terrain traps

2. Group Communication — The Key to Team Safety
Poor group communication is a consistent factor in avalanche accidents. Clear, explicit communication prevents the cognitive biases — groupthink, deference, assumed consensus — that cause groups to collectively make decisions no individual would make alone.
Plan · Clarity · Check InGroup Communication
Hold a Pre-Trip Meeting
Before leaving, every group member needs to understand the route, the current risk level from the bulletin, the day's no-go criteria, and what happens in an emergency. This is not optional — it is the group's safety foundation.
- Review the bulletin and its key hazards explicitly — don't assume people have read it
- Assign roles: group leader, navigator, rescue coordinator
- Agree on alternate routes and turnaround criteria before starting
- Confirm everyone's gear is working and they know how to use it
Use Clear, Specific Language
Vague communication under stress causes dangerous confusion. In high-consequence terrain, every instruction should be specific and unambiguous — and confirmed understood.
- "Stop here and wait at the rock, don't move until I signal" — not "hold on"
- Agree on hand signals for situations where voice communication is impractical (wind, distance)
- Anyone can — and should — call a halt if they have a concern. Make this explicit.
Check In Regularly at Safe Zones
Conditions change — and so does the group. Fatigue, stress, and cold affect judgment. Regular check-ins at safe zones surface concerns before they become decisions made in dangerous terrain.
- At each safe zone: how is everyone feeling? Any concerns about conditions or route?
- Invite dissent explicitly — the quietest person in a group is often the one who has noticed something important
- Reassess the plan against what you've observed since the last check-in

3. Adaptability — Flexibility Saves Lives
The mountains rarely deliver exactly what the forecast predicted. Being prepared to change — or abandon — your plan when conditions differ from expectations is one of the defining characteristics of experienced backcountry travellers.
Monitor · Decide · Turn BackAdaptability
Establish Pre-Determined No-Go Criteria
The most reliable way to override summit fever and groupthink is to agree on the conditions that trigger a retreat before you leave — when thinking is clear and not influenced by commitment or excitement in the field.
- Define your criteria explicitly: "If we hear a whumpf, we turn back." "If cracks appear, we turn back." "If visibility drops to X, we turn back."
- Write them down if it helps. The criteria must be followed when triggered — not reopened for discussion on the slope.
Monitor Conditions Continuously
A stable morning snowpack can change significantly by afternoon. Wind picks up. Temperature rises. New instability signals appear. Reading conditions is not a single assessment at the start of the day — it is continuous throughout.
- Watch for whumpfing, cracking, changes in snow texture underfoot
- Monitor weather — cloud build-up, wind direction changes, temperature
- Watch for natural avalanche activity on surrounding slopes as you travel
Treat Turning Back as the Correct Decision
Retreat is not failure. The cultural pressure to "complete the objective" is one of the most dangerous forces in backcountry travel. Experienced mountaineers turn back more often than beginners — not less. The summit doesn't go anywhere.
- Frame the turn-back decision positively within the group — "we made the right call" not "we failed"
- Identify alternate objectives at lower angles and safer terrain before you leave — so a retreat still offers a good day
4. Additional Best Practices
Carry and Know Your Gear
Every group member carries transceiver, probe, and shovel — and has practiced with them before the season. Gear you can't use under pressure is no protection at all.
Travel in Small Groups
Groups of 4–6 are easiest to manage in avalanche terrain. Larger groups create more noise, more terrain exposure, more decision-making complexity, and greater burial risk if something goes wrong.
Respect the Bulletin — Every Time
Check La Chamoniarde or Météo France before every trip. A Level 2 or 3 day deserves the same diligence as Level 4. Most accidents happen at the middle levels because people don't treat them seriously enough.
Stay Updated on Weather
Conditions change quickly in the mountains. Monitor the sky throughout the day — cloud build-up, wind shifts, temperature changes. The forecast is a starting point, not a guarantee.
5. Practical Example — Putting It All Together
The Scenario
Backcountry skiing with three friends in Chamonix. The bulletin reads Considerable (Level 3), with specific warnings about wind slabs on north-facing slopes. You've held a pre-trip meeting, agreed on no-go criteria, and assigned roles.
Result: By applying all three pillars — deliberate travel, clear communication, and pre-agreed adaptability — the group navigates a Considerable day without incident and completes a safe, enjoyable tour. The decision to change the line midway was made without hesitation because it had already been agreed upon. That's what preparation looks like in practice.
Key Takeaway — Chapter 7
Best practices in avalanche terrain are not advanced techniques for experts — they are fundamental habits that every backcountry traveller should build from day one. Expose one person at a time. Stop only in safe zones. Communicate explicitly, before and during the day. Establish your no-go criteria before you leave, and follow them without debate when they're triggered. Treat turning back as a good decision. These behaviours, applied consistently, are what separate the people who return safely from those who don't.
Final Thoughts — Educate, Prepare, and Stay Safe
You've completed the course. Here's what matters most.
The mountains are awe-inspiring — and they are unforgiving. Avalanches are not random events. They follow specific patterns driven by weather, terrain, and snowpack, and they can be anticipated, understood, and largely avoided through preparation and knowledge. That's what this course has been about.
Preparation is more than packing the right gear. It is a mindset: checking the bulletin before every trip, practicing rescue skills before you need them, understanding that sometimes the wisest decision is to turn back. The mountain will always be there. Your safety — and the safety of everyone in your group — must come first, every time.
The mountains demand respect, and part of that respect is humility. Even experienced alpinists make mistakes. Ongoing learning, continued practice, and genuine adaptability in the face of changing conditions are what distinguish the travellers who keep returning safely across a lifetime in the mountains.
Adventure responsibly. Stay vigilant. Prioritise safety over goals. And when you come home safe, go back.

Course Complete
Avalanche Awareness: The Full 7-Part Course
You've covered everything from the science of avalanche formation to the field habits that keep you safe. Return to any chapter whenever you need a refresher — and share the course with anyone heading into the backcountry for the first time.
Bring the Mountains Home
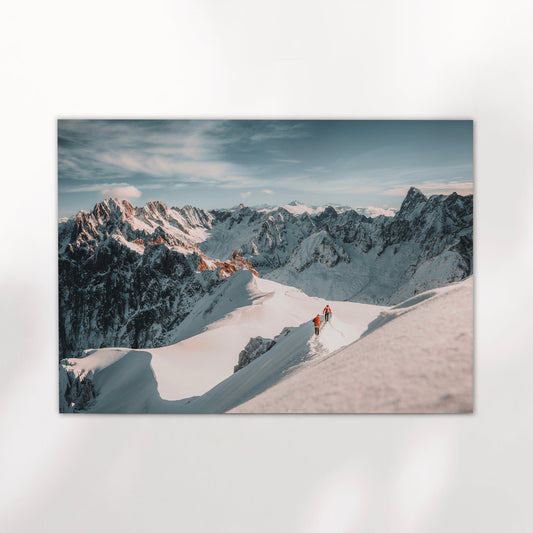
Fine art prints of the Chamonix Valley — from €22,75. Ships worldwide in 3–9 days.
Shop Chamonix Prints →