Avalanche Awareness: Part 2: Essential Avalanche Equipment: Your Lifeline in the Backcountry
Share
In the first part of this 7-part course on avalanche safety, we explored the types of avalanches, their causes, and the risks they pose. With that foundational understanding, we now move to the tools you need to survive and respond in avalanche terrain.
Missed Part 1? Click here
No matter how experienced or cautious you are, accidents happen. Proper avalanche safety gear is not optional—it’s your lifeline in the backcountry. However, owning the gear isn’t enough. You must know how to use it effectively and practice regularly in realistic conditions. In an avalanche, every second counts, and the better prepared you are, the more likely you’ll be able to save a life—whether it’s yours or someone else’s.
This section will cover the essential avalanche equipment you should always carry, how each item works, and why training with your gear is just as important as having it. Let’s dive in!
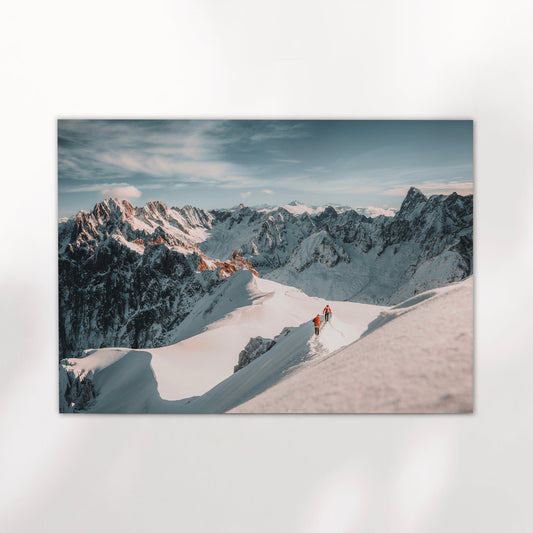
Capture the Adventure: Visit Our Print Store and Follow Us on Instagram
As you explore the beauty of the Chamonix Valley, why not bring a piece of the Alps home with you? Our Chamonix-themed print store offers a curated selection of stunning art prints inspired by the region’s awe-inspiring landscapes. From dramatic mountain landscapes to peaceful alpine valleys, our prints make the perfect souvenir or gift for any mountain lover.
Follow us on Instagram at @chamonixprints for daily inspiration, behind-the-scenes glimpses of the Alps, and exclusive offers. Share your adventure photos with us by tagging #ChamonixPrints—we’d love to see your adventures in Chamonix!
Avalanche Transceiver
The avalanche transceiver (or beacon) is your primary tool for locating someone buried under the snow. It emits a radio signal when in "transmit" mode and can receive signals when in "search" mode. Modern transceivers are designed to be user-friendly but require practice to use efficiently in an emergency.
- Purpose: To send and receive signals that help locate buried victims.
- How to Use It:
- Transmit Mode: Always keep your transceiver in “transmit” mode when traveling in avalanche terrain. Wear it close to your body, ideally in its harness or a secure pocket, to prevent it from being lost during an avalanche.
- Search Mode: In a rescue situation, switch your transceiver to “search” mode. Follow the directional arrows and distance readout to locate the strongest signal.
- Pinpointing: Once you’re close to the victim (within 1–2 meters), use fine movements to narrow down the location.
- Practice Is Key:
- Practice regularly in various scenarios, such as multiple burials and poor visibility, to build muscle memory.
- Join avalanche safety courses where you can train with your transceiver under expert guidance.
- What to Look For When Buying:
- Three Antennas: Modern transceivers with three antennas are far more accurate for pinpointing burials.
- Multiple Burial Functionality: This allows you to flag one signal and continue searching for others.
Quick Tip: Check your transceiver batteries before every trip and carry spares. A dead transceiver is as dangerous as not having one at all.

Probe
The probe is used to pinpoint the exact location and depth of a buried person. Time is critical in avalanche rescues, and the probe allows you to locate a victim quickly once the transceiver gets you close.
- Purpose: To locate a buried person and determine how deep they are under the snow.
- How to Use It:
- Deploy Quickly: Pull the probe from its storage in your pack and extend it until it locks into place. Practice deploying it quickly so it becomes second nature.
- Insert Systematically: Begin probing where the transceiver signal is strongest. Work in a grid pattern, moving systematically until you feel resistance.
- Confirm the Strike: Once you locate the victim, leave the probe in place to guide shoveling.
- What to Look For When Buying:
- Length: Probes typically range from 240 to 320 cm. Longer probes are better for deep snowpacks, such as those in Chamonix.
- Durability: Choose a lightweight but sturdy material like aluminum or carbon fiber.
Quick Tip: Practice probing in realistic conditions—frozen snow can be harder to penetrate than you might expect.

Shovel
An avalanche shovel isn’t just for digging; it’s designed to move heavy, compacted snow quickly and efficiently. Shoveling is one of the most time-consuming parts of a rescue, so technique and speed are critical.
- Purpose: To dig out the buried person. Snow in an avalanche sets like concrete, and only an avalanche-specific shovel is strong enough for the task.
- How to Use It:
- Strategic Shoveling: Start digging downhill from the probe strike to avoid collapsing snow onto the victim.
- Create a “V” Shape: Remove snow in a widening “V” shape as you dig toward the victim to make the process more efficient.
- Throw Far: Toss the snow far from the excavation site to avoid re-burying the victim.
- What to Look For When Buying:
- Collapsible Design: A collapsible or telescoping handle makes the shovel easier to pack and deploy.
- Strong Blade: Choose a metal blade—plastic shovels often fail under heavy loads.
Quick Tip: Shovelling takes more time and energy than you might think. Train with your shovel regularly to build strength and speed.

Backpack with Airbag System
Airbag packs are a game-changer in avalanche safety. When deployed, the airbag increases your surface area, helping you “float” on top of the avalanche debris and reducing your chances of burial.
- Purpose: To keep you closer to the surface of the avalanche, increasing your chances of survival.
- How to Use It:
- Wear It Properly: Adjust the pack so it fits snugly and comfortably, with easy access to the pull handle.
- Deploy Immediately: If you’re caught in an avalanche, pull the handle as soon as possible. The airbag inflates within seconds.
- What to Look For When Buying:
- Activation System: Choose between canister systems (compressed gas) and electric fans. Fan systems are reusable without refilling.
- Pack Size: Look for a size that fits your needs—larger packs for multi-day trips, smaller packs for day tours.
Quick Tip: Practice deploying your airbag so it becomes instinctive. Check the system regularly to ensure it’s in working order.

Additional Gear You Should Carry
- First Aid Kit:
- Include trauma supplies for fractures, wounds, and hypothermia.
- Add lightweight but effective items like SAM splints and thermal blankets.
- Emergency Supplies:
- Carry extra layers, a survival bivy, high-calorie snacks, and water.
- Include fire-starting tools in case you’re stranded.
- Communication Device:
- A satellite communicator like the Garmin inReach can send an SOS even in areas without cell service.
- Helmet and Goggles:
- Helmets protect against trauma during an avalanche. Goggles prevent snow blindness and keep your vision clear.
Why Practice Is Critical
Owning avalanche gear isn’t enough. You must practice regularly with all your equipment in realistic scenarios. Practice in a group setting to coordinate with others and simulate high-pressure situations.
Recommended Training:
- Take an avalanche safety course, such as those offered by La Chamoniarde in Chamonix.
- Join group practice sessions to refine your skills in beacon searches, probing, and shovelling.

Key Takeaway
Avalanche safety gear saves lives, but only if you know how to use it. Familiarize yourself with your equipment, practice regularly, and maintain your gear to ensure it’s ready when you need it. The mountains demand preparation—don’t cut corners when it comes to your safety.
Ready to follow onto the next lesson? Click here for chapter 3 - Recognising Avalanche Terrain: A Critical Skill for Backcountry Safety


